How to Sunblock Your Kids Without Poisoning Them with Sunblock

Sure, getting your kid to wear a hat is the first line of defense, but unless they’re wearing a sombrero, from their shoulders down will still be exposed. Like most people I see at the beach, I sprayed my kids down with waterproof sunblock from a can or slathered on some name brand SPF 1000–the higher the number the better right? Nope, the experts recommend no lower than SPF 30 and no higher than SPF 50.

Then I happened to read about the toxicity of the chemicals found in common sunscreens. BreastCancerFund.org tells me “octyl-methoxycinnamate, which is estrogenic and has thyroid hormone-disrupting effects, is found in over 800 sunscreens.” Great. Since my kids were babies I’ve been diligently disrupting their hormones…

Well, when I know better I try to do better, thank you Maya Angelou.

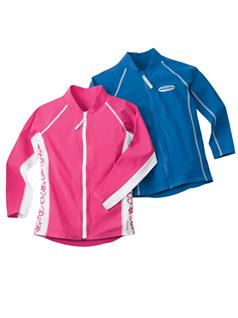
http://www.sunprecautions.com/product/84300

http://www.sunprecautions.com/ product/84300

But what would be an effective replacement? I could cover them in protective clothing, but then I’d never get them out of the house. Long sleeves at the beach? Maybe in fall and winter. But July?

“You want me to wear what? No thanks Mom, I’ll just stay in the air conditioning and play video games all day.”

So this summer I decided to get the kids involved in a little research test. We would try out a few of the “healthier alternative” sunblocks that we could actually afford and see which one(s) we liked.

Our criteria included: EWG rating, SPF, packaging, price, ease of application, feel of product on skin, color of skin after application, time before reapplication, water and sweat resistance, smell, and finally, did it prevent sunburn?

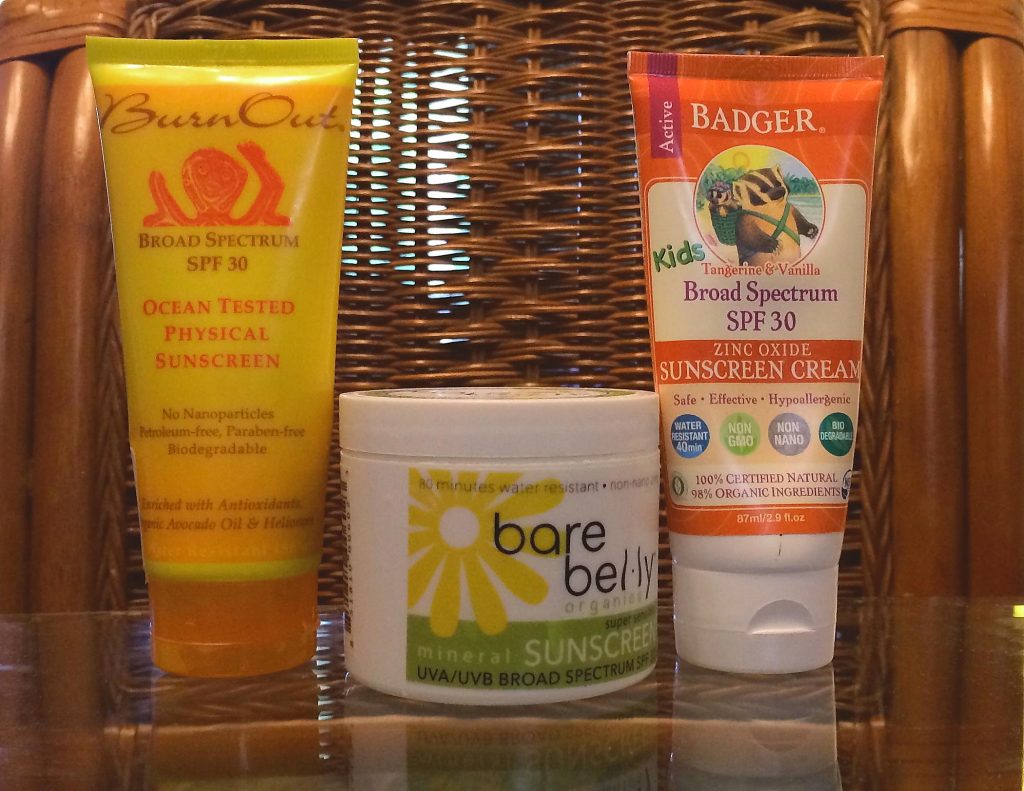
Our three test products:

Three sunblocks chosen for a summer-long comparison

Three sunblocks chosen for a summer-long comparison

When and Where we tried them out? Summer Camps, Sports, Swimming, Beach, Gardening, and Outdoor Fairs all summer long…

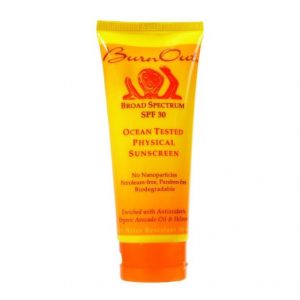
Our family gives Burnout 4.5 out of 5 stars

Our family gives Burnout 4.5 out of 5 stars

Our first Sunblock is BURNOUT OCEAN TESTED PHYSICAL SUNSCREEN

  1. EWG rating: 1 (the lower the better)
  2. SPF: 30
  3. Packaging: Easy to get the product out of the tube, fits in a purse, beach bag, back pocket
  4. Price: $13.99 for 3.4 OZ on Amazon
  5. Ease of application: Easy to put on and rub in
  6. Feel of product on skin: Doesn’t feel tacky or sticky, light, non-oily
  7. Color of skin after application: Pale gray at first, slight sheen later
  8. Time before reapplication: one hour
  9. Water and sweat resistance: water beaded up, sunblock ran into eyes when daughter played tennis, rubbed off on clothing very easily, washes off hands with soap and water
  10. Smell: no unpleasant smell, neutral
  11. Did it prevent sunburn: Yes!
  12. OVERALL RATING 4.5 out of 5 stars

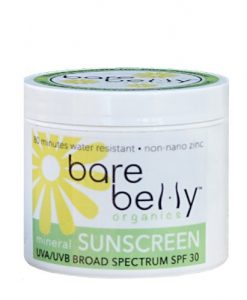
Our second Sunblock is BARE BELLY ORGANICS MINERAL SUNSCREEN

Our family gives Bare Belly a 2.5 out of 5 stars

Our family gives Bare Belly a 2.5 out of 5 stars

  1. EWG rating: 1 (the lower the better)
  2. SPF: 30
  3. Packaging: Easy to get the product out of the tub, fits in a purse, beach bag, but not a back pocket
  4. Price: $17.95 for 4 OZ from Bare Belly Website
  5. Ease of application: Difficult to put on and rub in
  6. Feel of product on skin: Gritty, thick
  7. Color of skin after application: Chalky White, strong sheen later
  8. Time before reapplication: one hour
  9. Water and sweat resistance: water beaded up, sweat resistant, rubbed off on clothing, washes off hands with soap and water
  10. Smell: smells like lard
  11. Did it prevent sunburn: Yes! but my kids and I could not get past the consistency and smell of this stuff.
  12. OVERALL RATING 2.5 out of 5 stars
Our family gives Badger Kids a 3 out of 5 stars

Our family gives Badger Kids a 3 out of 5 stars

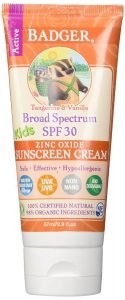
And finally BADGER KIDS SUNSCREEN CREAM

  1. EWG rating: 1 (the lower the better)
  2. SPF: 30
  3. Packaging: Easy to get the product out of the tube, fits in a purse, beach bag, and a back pocket
  4. Price: $13.50 for 2.9 OZ from Amazon
  5. Ease of application: Easy to put on and rub in
  6. Feel of product on skin: Doesn’t feel tacky or sticky, light, non-oily
  7. Color of skin after application: White at first, slight sheen later
  8. Time before reapplication: half hour
  9. Water and sweat resistance: water beaded up, sweated off after 30 minutes, rubbed off on clothing, washes off hands with soap and water
  10. Smell: Dreamsicles, you know the orange and vanilla popsicles? Smells just like them. I loved the smell, but so did every bug within a 30 ft radius.
  11. Did it prevent sunburn: Yes! but if your the type of person that naturally attracts bugs this will only enhance your attractiveness, so you better wear bug repellant too.
  12. OVERALL RATING 3 out of 5 stars

So this little non-scientific study was how I got my kids to wear sunblock all summer! Hands down BurnOut was the winner. Keep in mind these three sunblocks are all “barrier” types, so it’s best to compare them against each other and not against the chemical- based sunblocks most of us are used to. Also, these descriptions and ratings are from my family based on our own unique experience. We were not compensated in any way and I purchased the products myself.

Have you used a barrier sunblock before? Which ones do you like?

Summer Binge Watching

Also known as HOW I SPEND MY SUMMER VACATION

If you know me, you know I don’t get out much during the school year. 60-hour work weeks and a house full of kids and pets keeps me from indulging in extracurricular activities, including watching all the TV shows that everyone talks about.

So during the summer when I’m not chauffeuring the kids to camp, or cranking out my next novel, I binge watch. Come to find out, I actually prefer binging to the weekly sample size. Enjoying a season or two, or five, within a week is . . . fun! And since none of it moves into long-term memory, I can binge some of my favorite series more than once!

My Top Ten TV Series for Binge Watching

Firefly__Best_TV_Series_Ever

  1. Firefly, followed by the movie Serenity
  2. Game of Thrones
  3. The Walking Dead
  4. The West Wing
  5. Outlander
  6. The Good Wife
  7. Buffy the Vampire Slayer
  8. House of Cards
  9. Lost
  10. True Blood


For extra credit I like to binge watch Movie Series. Some of my favorites include:

IndianaJones_Best_Movie_Series_Ever

  • 4 Indiana Jones movies
  • 3 Lord of the Rings movies
  • 7 Harry Potter movies
  • 2 Kill Bill movies
  • 3 Dark Night movies
  • 3 Star Wars IV-VI movies
  • 8 Police Academy movies (don’t judge)
  • 4 Jurassic Park movies
  • 2 Bridget Jones’s Diary movies (with a 3rd on the way)
  • 3 Iron Man/ 2 Avenger movies
  • 4 Sharknado movies (come on, lighten up)Sharnado_You_Know_You_Love_It
  • 3 Godfather movies
  • 3 Matrix movies
  • 3 Toy Story movies
  • 13 Star Trek movies (best broken into sets by cast: 6/4/3)
  • 3 Back to the Future movies
  • 3 Spiderman movies (the ones with Tobey Maguire)
  • 4 Superman movies (the ones with Christopher Reeves)
  • 5 Alien/Prometheus movies (with a 6th on the way)
  • 7 Fast & Furious movies (with an 8th on the way)
  • Come_on_Its_JohnyDepp_playing_a_pirate5 Pirates of the Caribbean movies
  • 5 Terminator movies
  • 3 Naked Gun movies
  • 5 Die Hard movies
  • 4 Spy Kids movies (OK my kids love them and I love hanging with my kids, so, yeah, I watch these too)

Have I left off any of your favorites? Put them in the comments below!

Quick Summer Project? No, Not Really.

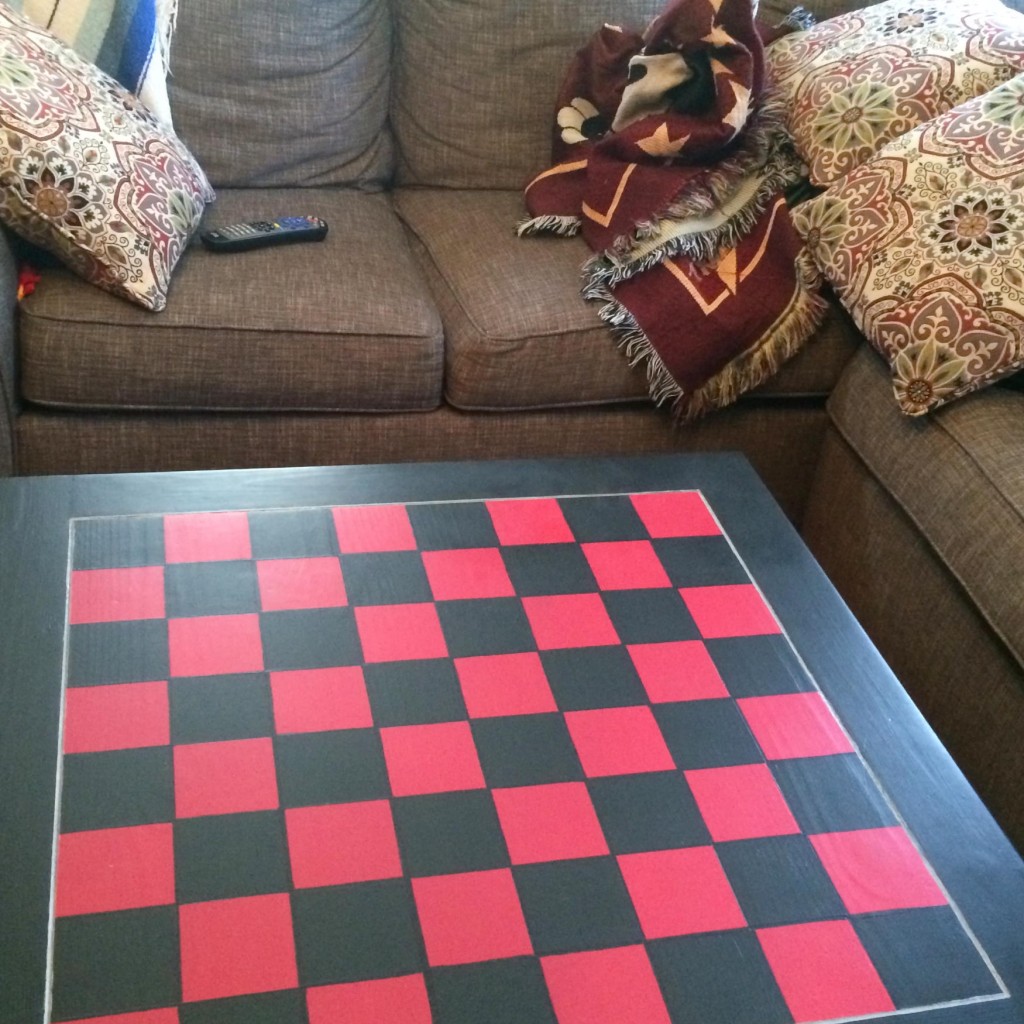
The checkerboard table. Fun for the whole family.

The checkerboard table. Fun for the whole family, but make no promises as to when this project will be completed.

Okay, okay. I admit I move slowly in the summer. Turtle slow. Any “side” project without a deadline gets put aside so I can meet more immediate needs: running my business, weeding the garden, driving the kids somewhere, writing/revising, making meals, playing Bubble Pop… Then once school starts and the teaching schedule hits full force, I’m lucky if I can scratch out fifteen consecutive minutes to take a shower, let alone work on something non-essential.

Which is why that great light-bulb-moment idea I had in July to turn my square coffee table into a checkerboard took me nearly three months to complete. Truly the only reason I finished is because I needed to clear out the work space in the garage in order to park the van. Once the weather cools all the trees in my yard start vomiting leaves and berries and sap and acorns. Anything left out in the driveway is quickly doused with an autumn explosion of sticky. Starting in October, I had to scrub wipe down my van’s windows before I could see through them to drive. This ten minute morning ritual served as a nice reminder that I needed to get that #$^%!* (special) project done.

So here is my little table painting project, in picture steps, just in case you ever have a square table and some time on your hands. I’m sure you’ll finish much faster than I did.

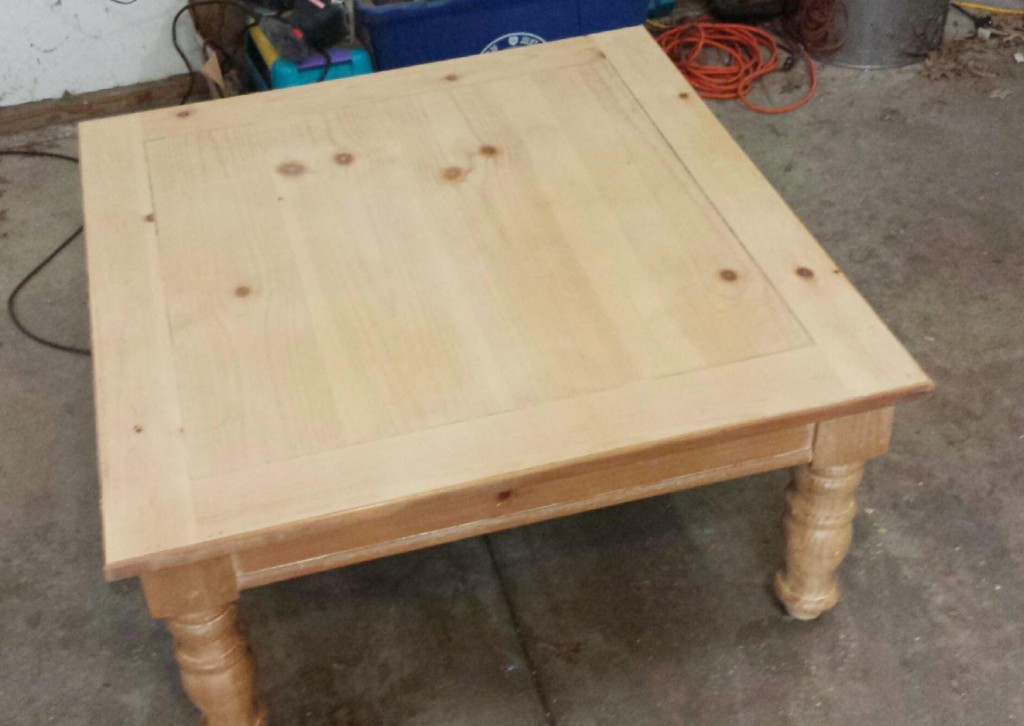
Step 1: Sand the table so it’s as smooth as . . . [insert appropriate noun here].

The square table, once covered with child graffiti, now sanded to pristine perfection.

The square table, once covered with child graffiti, now sanded to pristine perfection.

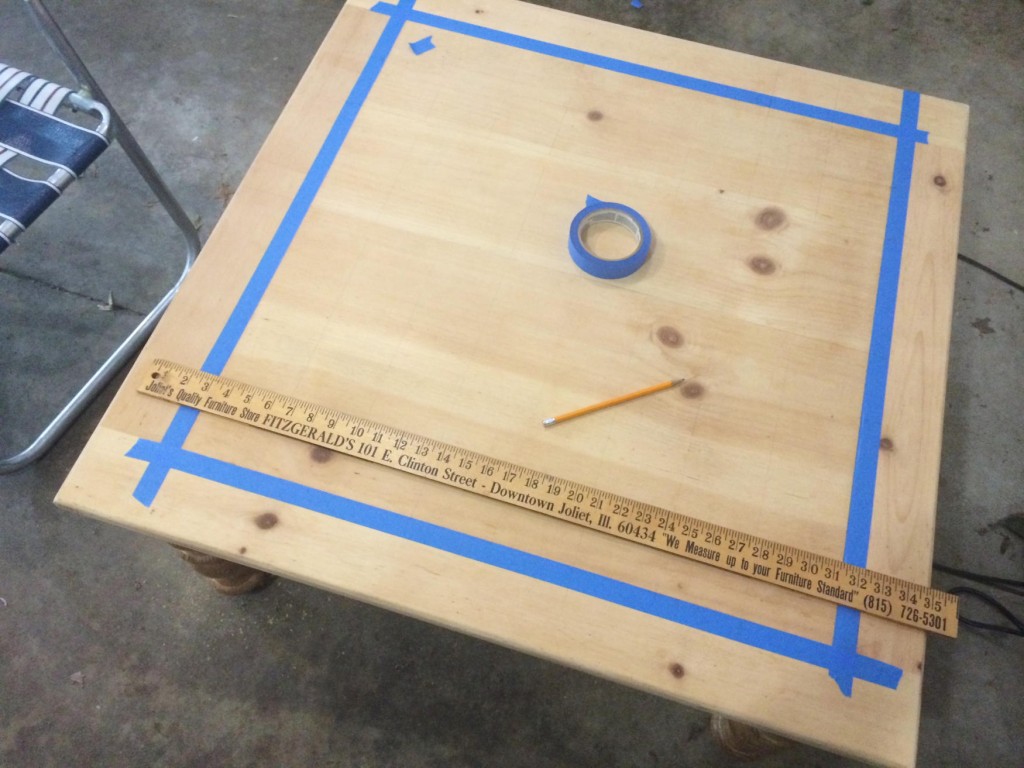
Step 2: Using painter’s tape, mask off a border. My table had a built-in border with a groove, so I masked to the inside edge of the groove.

Blue painter's tape is magic on a cardboard roll. Use it to create clean, straight paint edges.

Blue painter’s tape is magic on a cardboard roll. Use it to create clean, straight paint edges.

Step 3: A standard checkerboard is eight by eight squares. The size you choose for your squares will depend on the size of your table. In a perfect world the size of your table will evenly divide by eight. Mine didn’t. It was off by about 1/4″. So I found the center point of the table and with a yard stick and a pencil I divided the table into quadrants, then split those in half, and then half again. As a result my center squares are just a little bit smaller than the ones around the edges, but the difference is so small, no one but you and I will ever know.

Note to self: Pine wood is soft. Don’t press too hard when drawing lines with a pencil as gouges may result. More cursing sanding will ensue.

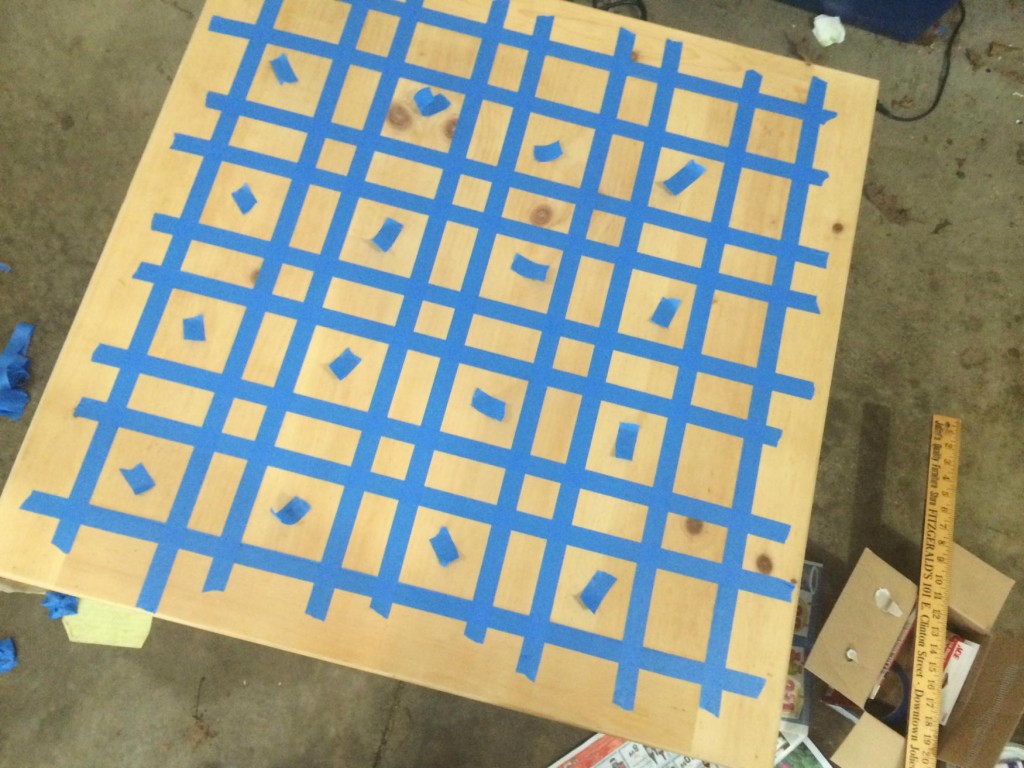
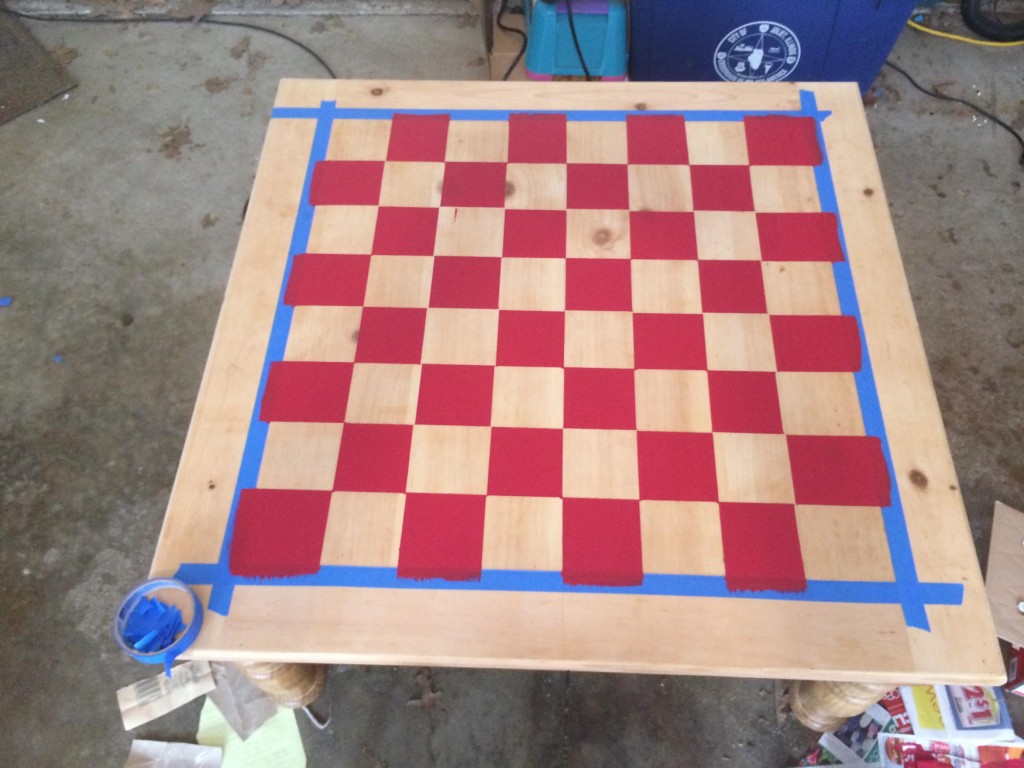
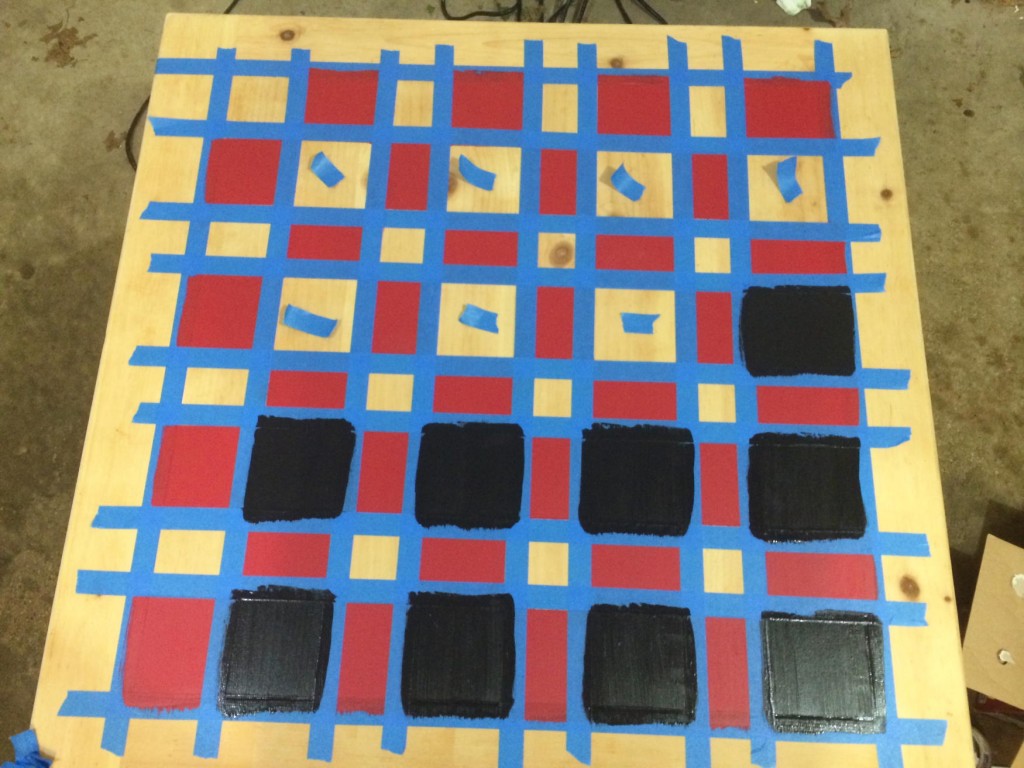
Step 4: Now here is where I used a lot of painter’s tape. I placed the outside edge of the tape on the outside of what would be the red squares in the first, third, fifth, and seventh columns. To remind myself which squares I planned on painting I marked them with a scrap of tape.

Press the tape down securely so the paint doesn’t seep underneath and ruin your edges.

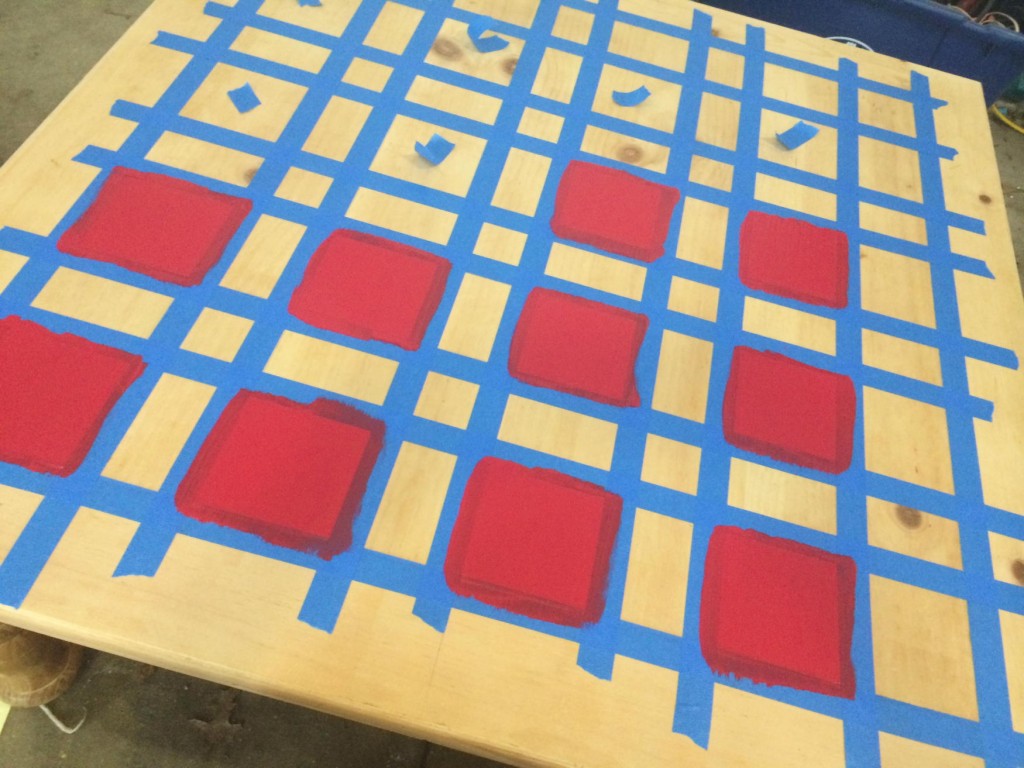
Step 5: I painted three coats of red, drying at least two hours (to two weeks) between coats. I used a flat finish water-based paint with primer already in the mix. I cleaned the paint brush after each coat (with soap and water) and made sure the paint brush was completely dry before proceeding to the next coat.

IMG_0681

Only paint the perfect squares (marked with a scrap of blue tape–pull off the scraps as you paint).

Step 6: When the first set of red squares was finished, I removed the taped edges. Then, I taped again on the outside edge of what would be the red squares running in the second, fourth, sixth, and eighth columns. I repeated the entire process: painting three coats of red, cleaning up and drying between coats. After the last coat of red dried, I removed all the tape, except the outside border (see below).

It's September and the red squares are done!

It’s September and the red squares are done!

Step 7: Now on to the black. I used a flat finish water-based paint and repeated the taping/painting process for the black squares making sure I taped the outside edge each time. I painted the even columns of black squares first, and then the odd. Three coats were used for each square.

When painting, always have your brush strokes go in the same direction as the grain of the wood.

When painting, always have your brush strokes go in the same direction as the grain of the wood.

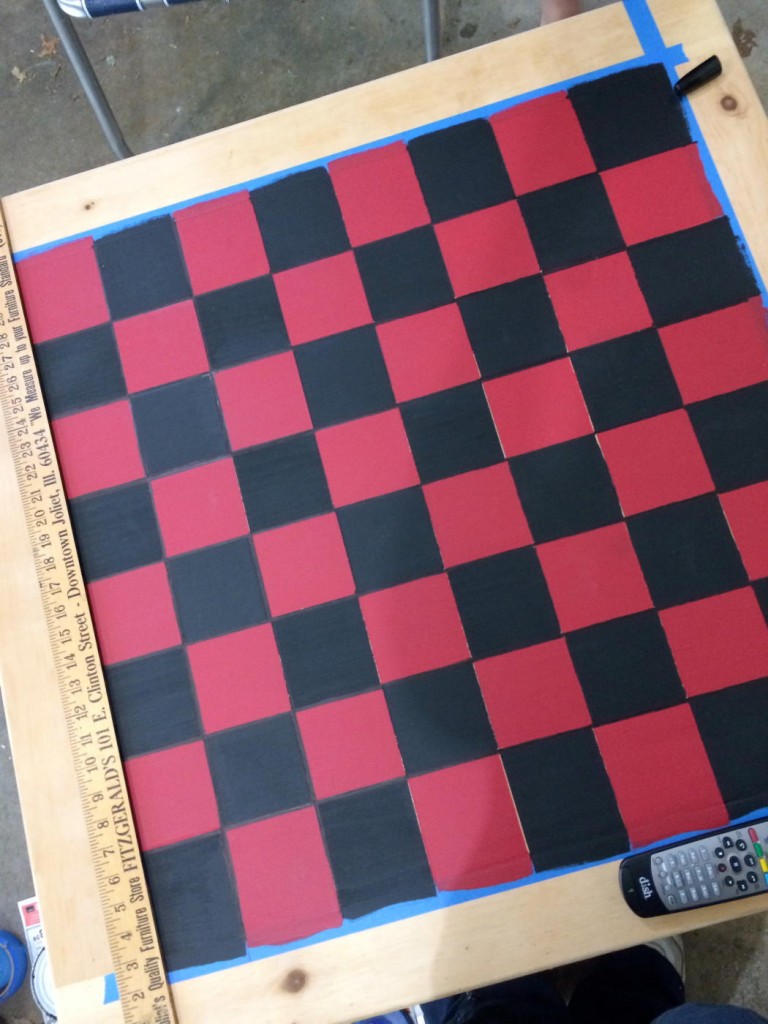
Step 8: After the last coat of black dried, I removed all the tape, except the outside border. Using a yard stick and a black permanent marker (medium chiseled edge Sharpie) I smoothed any rough edges caused by paint seeping underneath the tape.

When the black squares are done, remove the tape and prepare to paint the border.

When the black squares are done, remove the tape. Tidy edges with a black permanent marker.

Note to self: If you leave your project in the garage for more than a month, household members will start putting things on top of it, including the remote control for the TV in the garage. Any flat surface is at risk.

Step 9: I removed the inside border tape and re-taped the outside of the border to protect the red/black grid. Then I painted the border. I used three coats of black.

Step 10: I painted a thin line of silver metallic craft paint into the groove on the inside edge of the border. I used three coats of the silver, a small, thin paint brush, and a steady hand.

Step 11: I applied six coats of a flat polyurethane, drying between coats, lightly sanding with steel wool between the third and fourth coats. I let the last coat of polyurethane cure for one week and brought the table into the house.

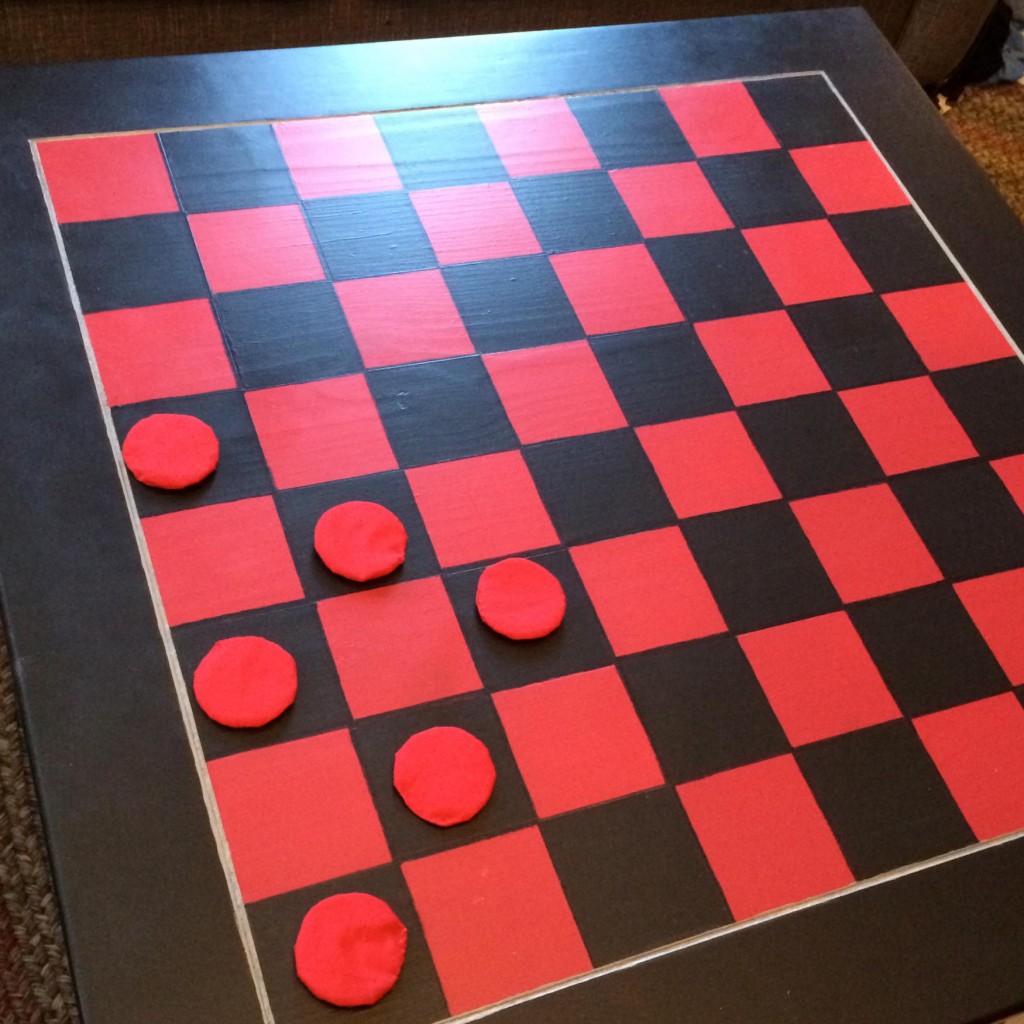
Next up, the winter project. Sewing and stuffing red and black checkers. Six red checkers done . . . check back in three months.

Checkers anyone?

Checkers anyone?

Extra tips: Use a paint that already has primer in the mix, otherwise you’ll have to prime the surface before painting. I painted a pine table with knots so coverage was important. You might not need so many coats. Follow instructions on the paint and polyurethane regarding drying times. For example, the polyurethane I used required an extended drying time after the second and fourth coats. Advice from the Home Depot paint guy who sold me the paint: Don’t shake your can of polyurethane. Ever. Always stir. Shaking puts bubbles into the medium which are next to impossible to remove.

Questions about this project? Ask in the comments and I’ll try to help.